By Emily
Our Sugarproof No-Bake Pumpkin Pie has been so popular and for good reason: it’s absolutely delicious, is easy to make, has no added sugar, and fits with many different dietary needs like paleo, vegan, gluten-free, and dairy-free.
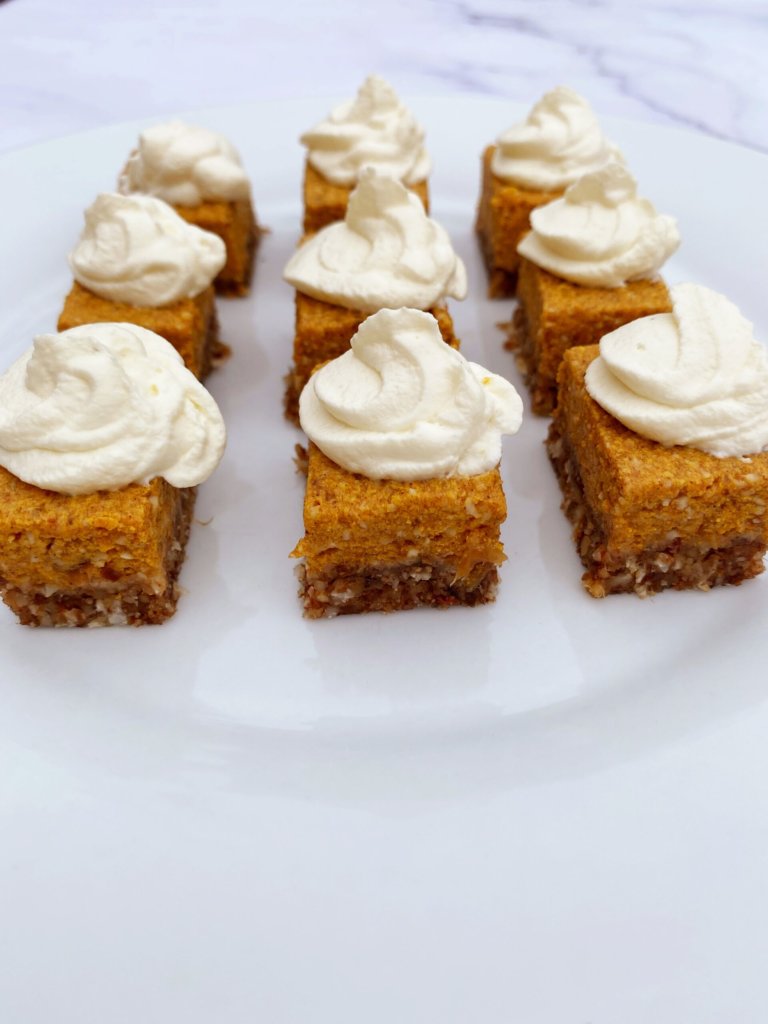
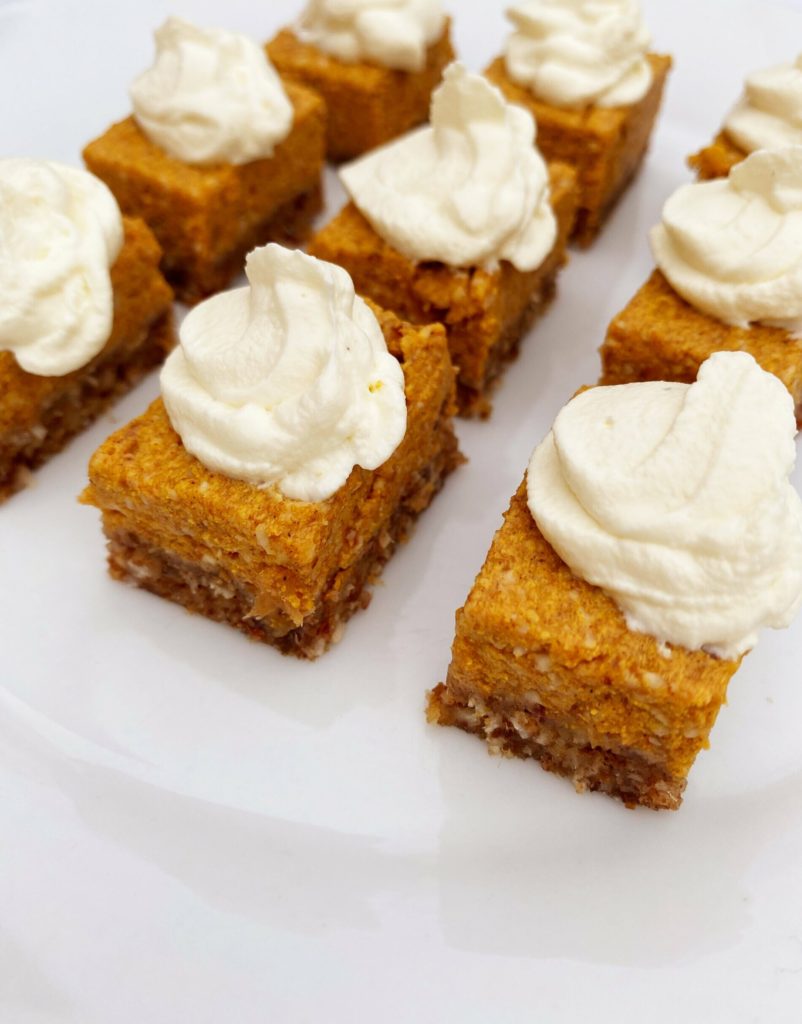
I made it live on Instagram recently with Kelly LeVeque and she mentioned that she thought it would be good as bars too. We tried it out and she was absolutely right. This same recipe makes amazing No-Bake Pumpkin Pie Bars, and we decided we especially love them when cut into mini-sized bites. They are so cute and are the perfect size for little hands.
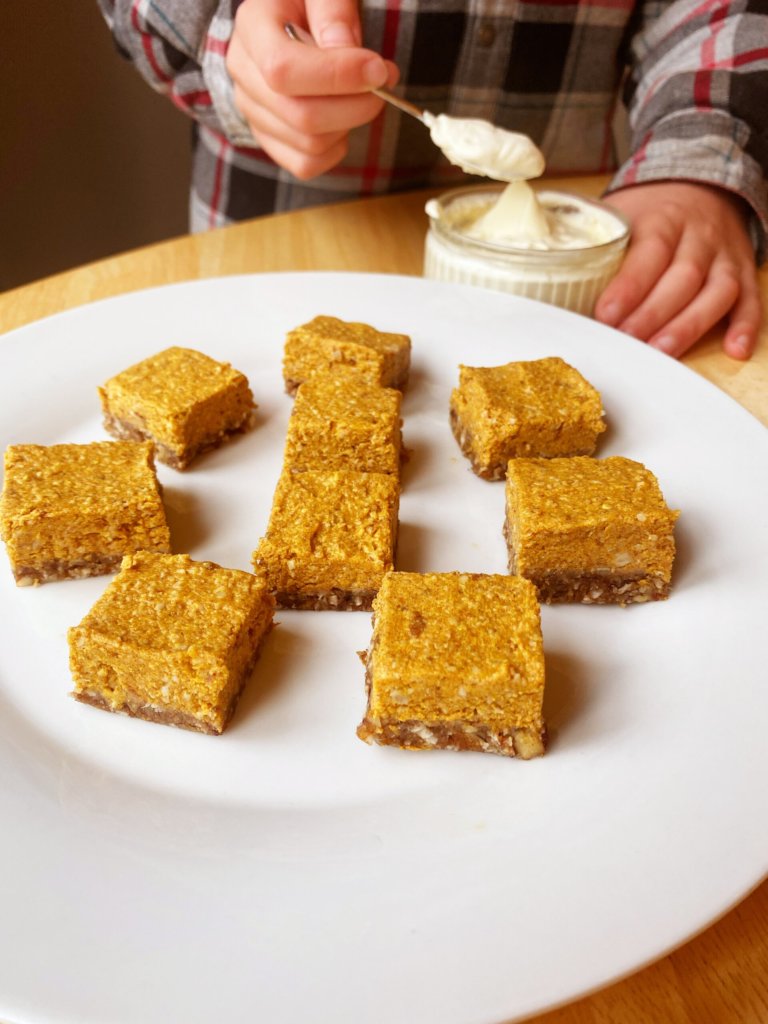
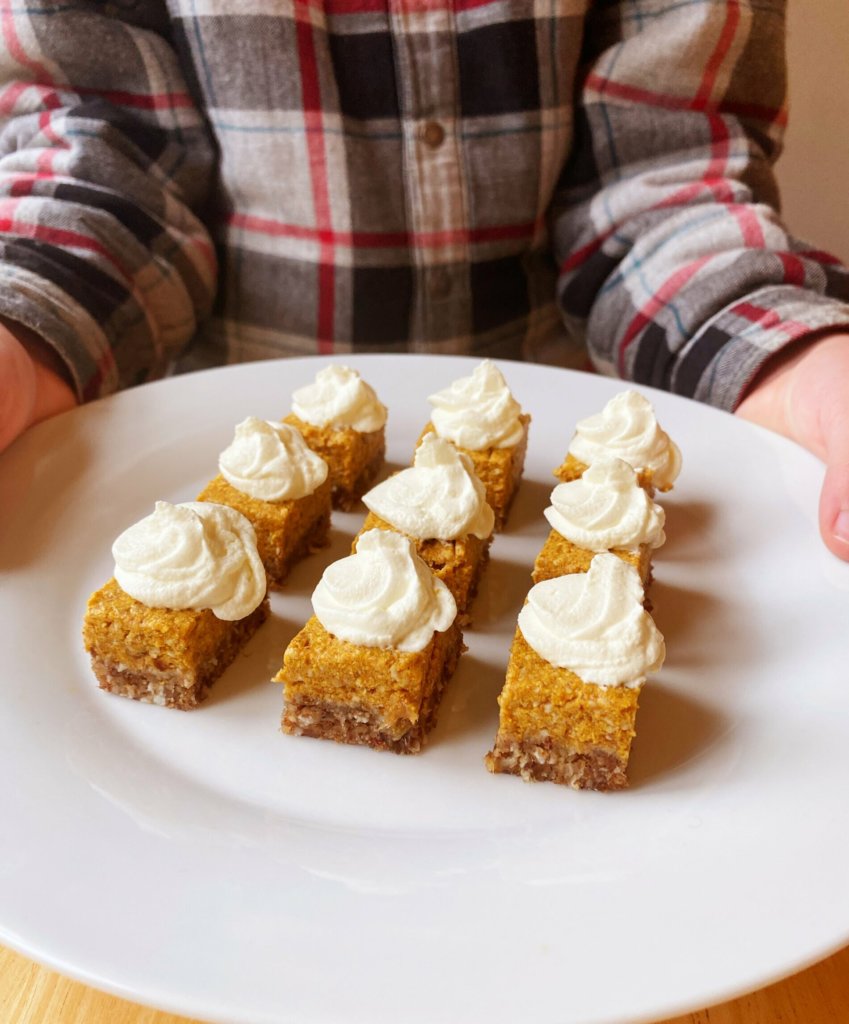
I also prefer having mini squares as I often am satisfied with a smaller amount than a whole slice too. This recipe makes 48 mini bites as compared to a pie which is typically cut into 8 slices. Having desserts in mini portion sizes helps reduce the amount of overall sugar everyone has but still feels fun and special– this something that Michael does with his family and they call it “Mini D.”
A standard piece of pumpkin pie has 25 grams (over 6 teaspoons) of total sugar in it, mostly coming from brown and white sugar that is added to the filling. A full slice of our Sugarproof Pumpkin Pie, in contrast, has 10g of total sugar, coming from the pumpkin and the dates. Each of these bites is only 1/6 of a piece of pie, meaning that each has less than 2 grams of sugar in it. What’s more, this recipe has double the fiber and more protein and healthy fat than standard pie, all of which help to prevent a spike in blood sugar and keep you and your kids feeling well after eating it rather than giving you a post-dessert crash or slump that you end up not feeling thankful for.
Another great thing about this recipe is that it is easy to make ahead and store in the freezer. This helps you avoid the logistical mess of trying to figure out when you have time to make the Thanksgiving dessert in the midst of cooking the main dishes and sides. Also they don’t compete for space in the fridge that is likely already jammed!
You make both layers of the bars in the food processor and don’t need to bake them. All you need to do is assemble the layers and put the pan in the freezer for at least 1 hour before slicing into bites. You can also freeze them ahead of time for longer than an hour — just allow them to thaw for about 20 minutes, then slice and serve!
Ready to give them a go? Here’s the recipe. You can see full pictures of how to make the crust and filling on the post for the pie.
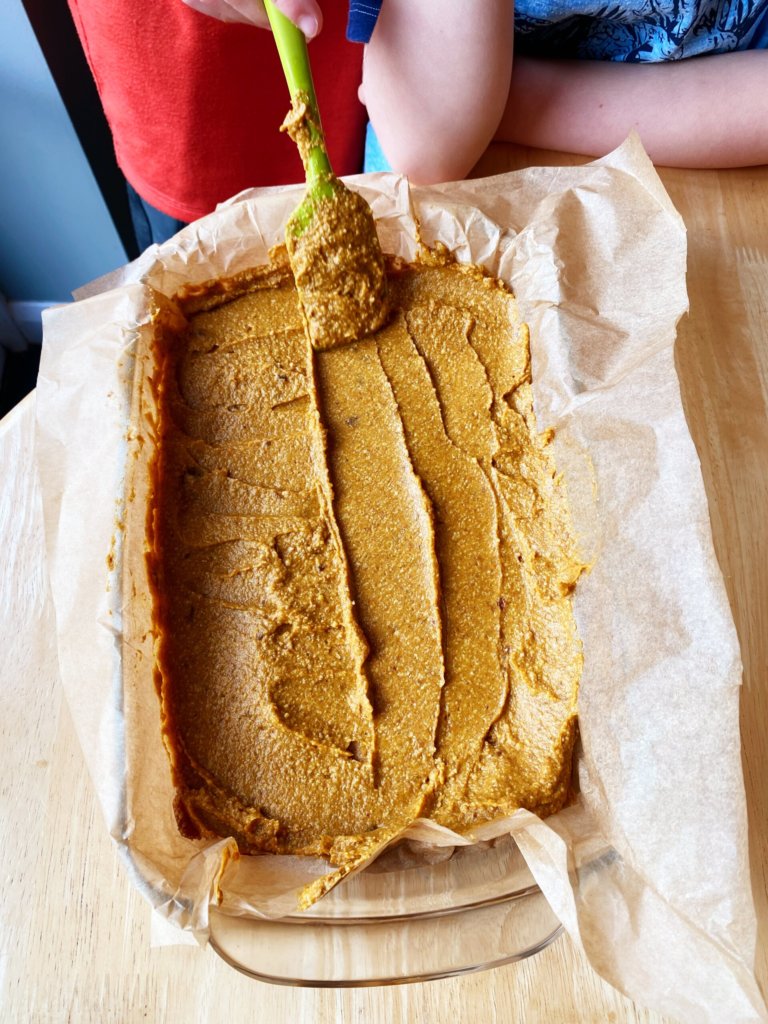
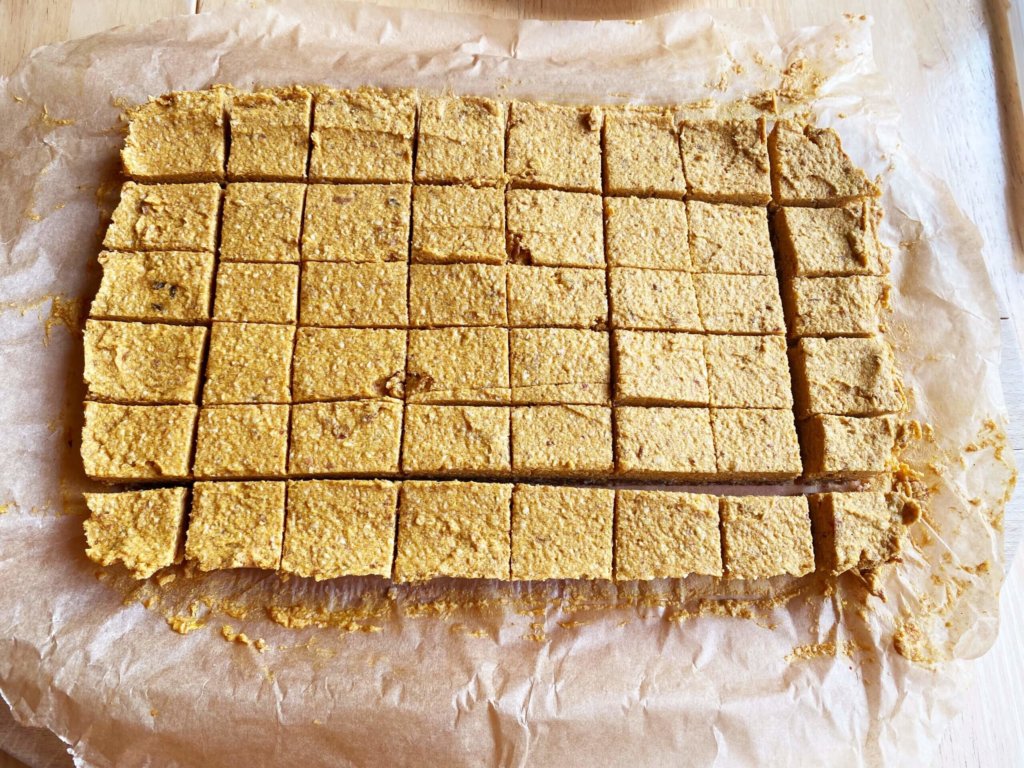
These pictures show how to create the layers in a 9″x13″ baking dish for bars:

Sugarproof No-Bake Pumpkin Pie Bites
Ingredients:
Crust layer:
–1 ½ cups (165g) raw pecans (or other nuts of choice)
–1 cup (125g) soft, pitted dates*
–1/2 cup (40g) dried, unsweetened coconut
–Pinch of sea salt
Pumpkin layer:
–1/2 cup (65g) raw cashews, soaked either in cold water overnight or in boiled hot water for 30 minutes, rinsed and well drained
–1 cup (220g) pumpkin puree (NOTE: if using homemade pumpkin puree, be sure that it is thick and not watery. You can remove excess water using the method described here.)
–1/2 cup (75g) coconut cream, thick/solid part only. (You can also just use the cream that rises to the top of a chilled can of coconut milk if you can’t find canned coconut cream.)
–1/2 cup (62g) soft, pitted dates*
–1/2 teaspoon vanilla extract, optional
–1 teaspoon cinnamon
–1/2 teaspoon dried ground ginger
–1/4 teaspoons sea salt
–1/8 teaspoons dried ground cloves
*Note: if your dates are dry or hard, soak them in warm water for 20 minutes to soften them, then drain them well.
Optional toppings:
–Whipped coconut cream, instructions below.
–Regular whipped cream, unsweetened
Method:
- If you haven’t soaked your cashews overnight, soak them now in boiled hot water for 30 min, rinse, and drain well. Also check your dates for both the crust and the filling and see if them seem dry or hard. If so, soak them in warm water for 20 minutes, then drain.
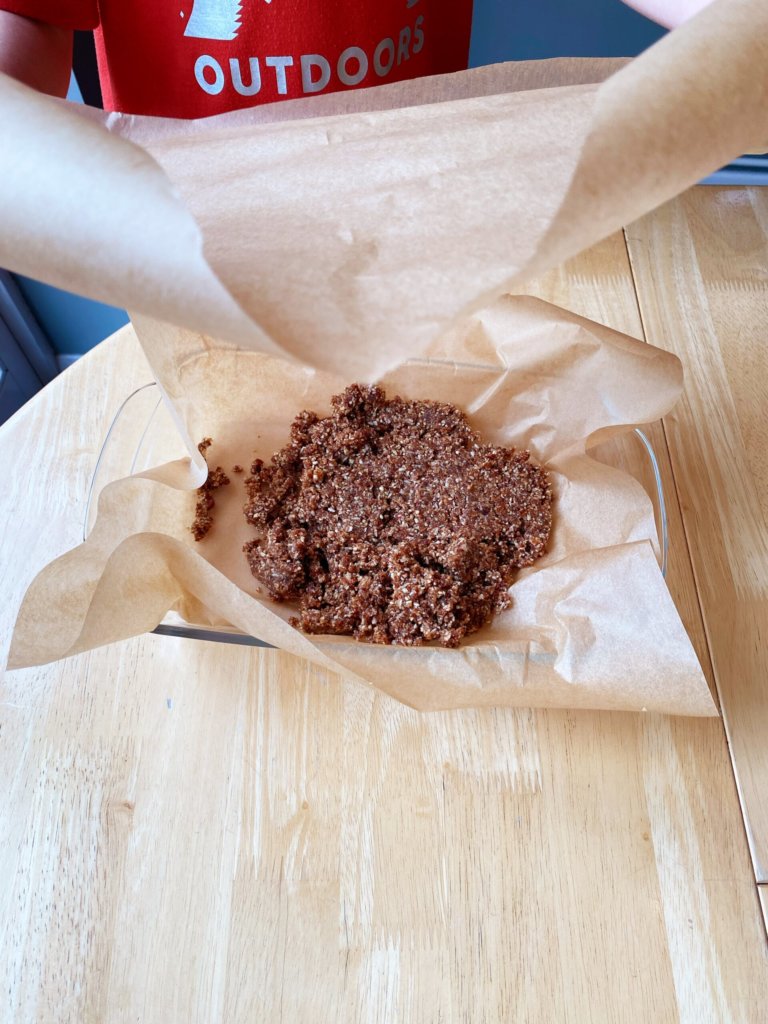
- Put the ingredients for the crust in a food processor and pulse until evenly chopped. Then process on low speed and eventually high speed for a few minutes until the mixture starts to pull away from the sides and collect towards the middle.
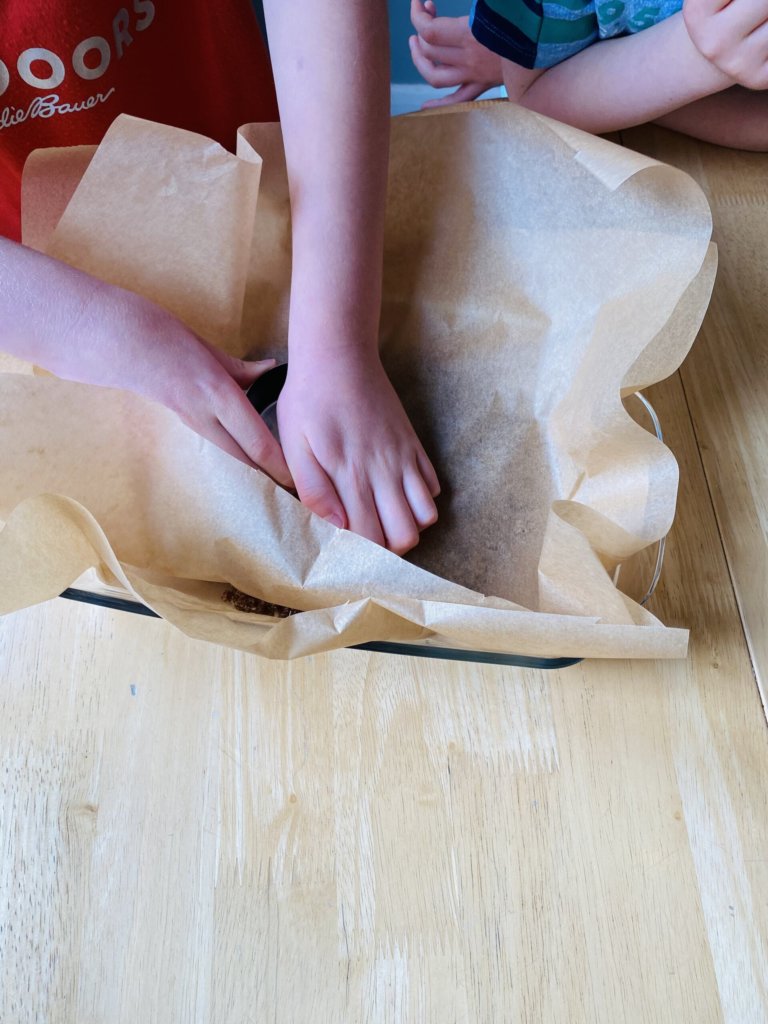
- Line a 9×13 rectangular baking dish with parchment/baking paper. Transfer the “dough” into the dish, cover with another layer of parchment and use a flat object like the bottom of a measuring cup or a glass to push the dough towards the edges of the pan, creating an even, flat layer.
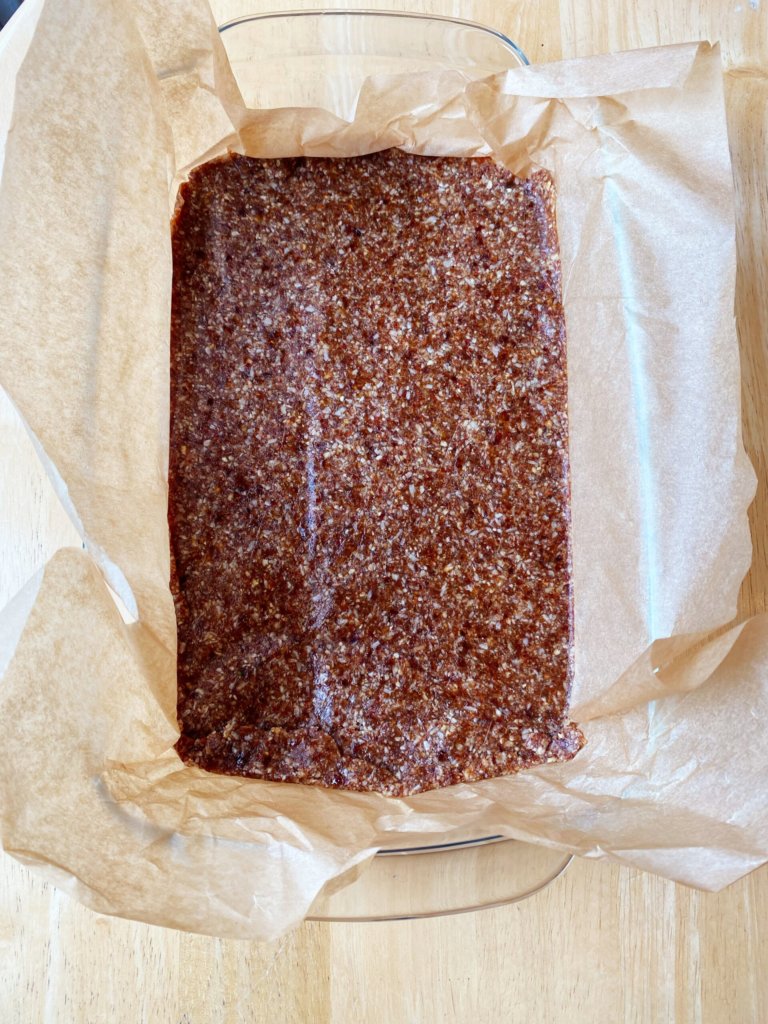
- Add the ingredients for the filling to the food processor (no need to wash it in between – hurray!). Pulse until roughly combined and then blend on high speed until smooth.
- Transfer the filling to the pan and even it out using a rubber spatula.
- Cover the dish and freeze it for an hour (or longer if desired).
- If frozen for longer than an hour, remove the pan from the freezer about 10-15 minutes before you plan to slice them.
- Remove the bars from the pan by lifting the parchment paper up. Transfer them onto a cutting board and using a sharp knife, cut them into small rectangles. We made 48 bites that are about 1×1 1/4 inches in size.
- If desired, top each bite with whipped coconut cream (recipe below), or regular unsweetened whipped cream. You can do this simply with a small spoon or for more precision pipe it on using a piping bag or Ziplock bag with the corner cut off.
Any uneaten bites can be stored in the refrigerator for 2-3 days.
Whipped coconut cream:
You can use the rest of what you opened for the pie filling if you have some left over, or use a new can of coconut cream or two cans of full fat coconut milk if not. Simply chill well and put the solid parts of the coconut cream or milk into a food processor, leaving behind any liquid. Whip it on high speed, stopping a few times to scrape down the sides of the bowl. (I find that the food processor works much better than a hand held mixer as it splatters less and results in a creamier, lighter texture.) Leaving the cream unsweetened works as a nice contrast to the sweetness of the pie.